Starting from seed
/"The first thing to remember is that plants inherently want to grow, so give them the right conditions, nine times out of ten they will do what you want them to do.The second is that gardening is not an exact science...."
Clare Foster
Author - "The Flower Garden" How to grow flowers from seed.
I've discovered that gardening is a little like cooking.
Everyone's Gran has a special way to stop the pasta sticking or weird ingredient to create the best Ginger Gems. It's the same with gardening.... you'll show your Mum this article and she will raise her eyebrows and say "hmmm well that's not how I'd do it".
Soooooo that's why I would like to kick off this post with a disclaimer that "this is how IIiiiiiii do it, however feel free to perfect your own process"!
I'm mostly sharing this for those of you that really haven't grown anything since those potato head tops in Primary School. Sometimes stuff just isn't that obvious!!!!
The non-expert way that I propogate my seedlings.
Things to consider:
Can your seeds be planted direct in the ground where you would like them to grow?
Read your seed packet (or note from Trade Me seller/google hard)
If so, just wait until the ground warms up a bit in Spring. Look for the arrival of annual weeds starting to green up the bare parts of your garden, this is a good sign that the ground is warm enough and ready!
Some plants HATE to be moved from pot to ground, so its important to understand the needs of what you are planting.
Some direct sewn plants I have are Larkspur, Nigella (Love in the mist) and Poppies.
If you are EXTRA motivated you can stagger your seed cultivation in rounds for say early Spring and mid Summer to ensure a full flower garden right through to the frosts.
With this in mind, if you feel compelled to give growing from seed a go, do so anytime during that period! After late Summer I'd suggest purchasing already established seedlings to plug into the garden to give you a chance for some colour before the frosts. But if you become really addicted to this process and have lots of room, you might start growing seedlings undercover in late Autumn/Winter ready for planting out in Spring....but you know, lets not get a head of ourselves.
It CAN be confusing, but some plants have annual AND perennial varieties. This isn't an issue but worth understanding what you are growing and investing your time in. Check the packets.
My beginners kit for starting seeds:
Seed Mix from garden centre or hardware store. Essentially newborn plant friendly potting mix with all the right healthy bits and nothing too strong.
Propagator sounds serious but its not!
I have one that I use over and over that I purchased from Oderings - essentially it is a mini green house. The little cells sit on a bio fabric that in turn sucks water through to the bases of each cell. It also has a clear plastic lid to keep things humid and cosy. It is robust and I use it year after year.
OR Modular seed trays. Re-using punnets from the garden centre or even egg cartons will work too! These will need to sit in a tray that you can fill with water, allowing them to suck up the moisture from the bottom of the cells.
OR/AND Biodegradable seed trays. These are quite good for larger seeds that are sturdy as they emerge through the soil and formed a few sets of seeds can be planted out into the garden complete with pot.
I ALSO just watched this vid on creating your own paper pottles AND this one that suggests using toilet rolls for growing Sweet Peas in.
Larger reusable pots that you can graduate your baby seedlings to before planting out in the garden.
I always save my plastic punnets I receive when buying plants from the garden centre and re-use just for this.
Trays for resting seed cells/pottles in to sap up water from their bases.
I have put old over trays to use for this many a time as they are easy to top up from the edges and, if flat, allow water to be evenly delivered to the whole multi tray.
Gardening gloves and mask for handling dry seed mix (Legionnaires Disease is real)
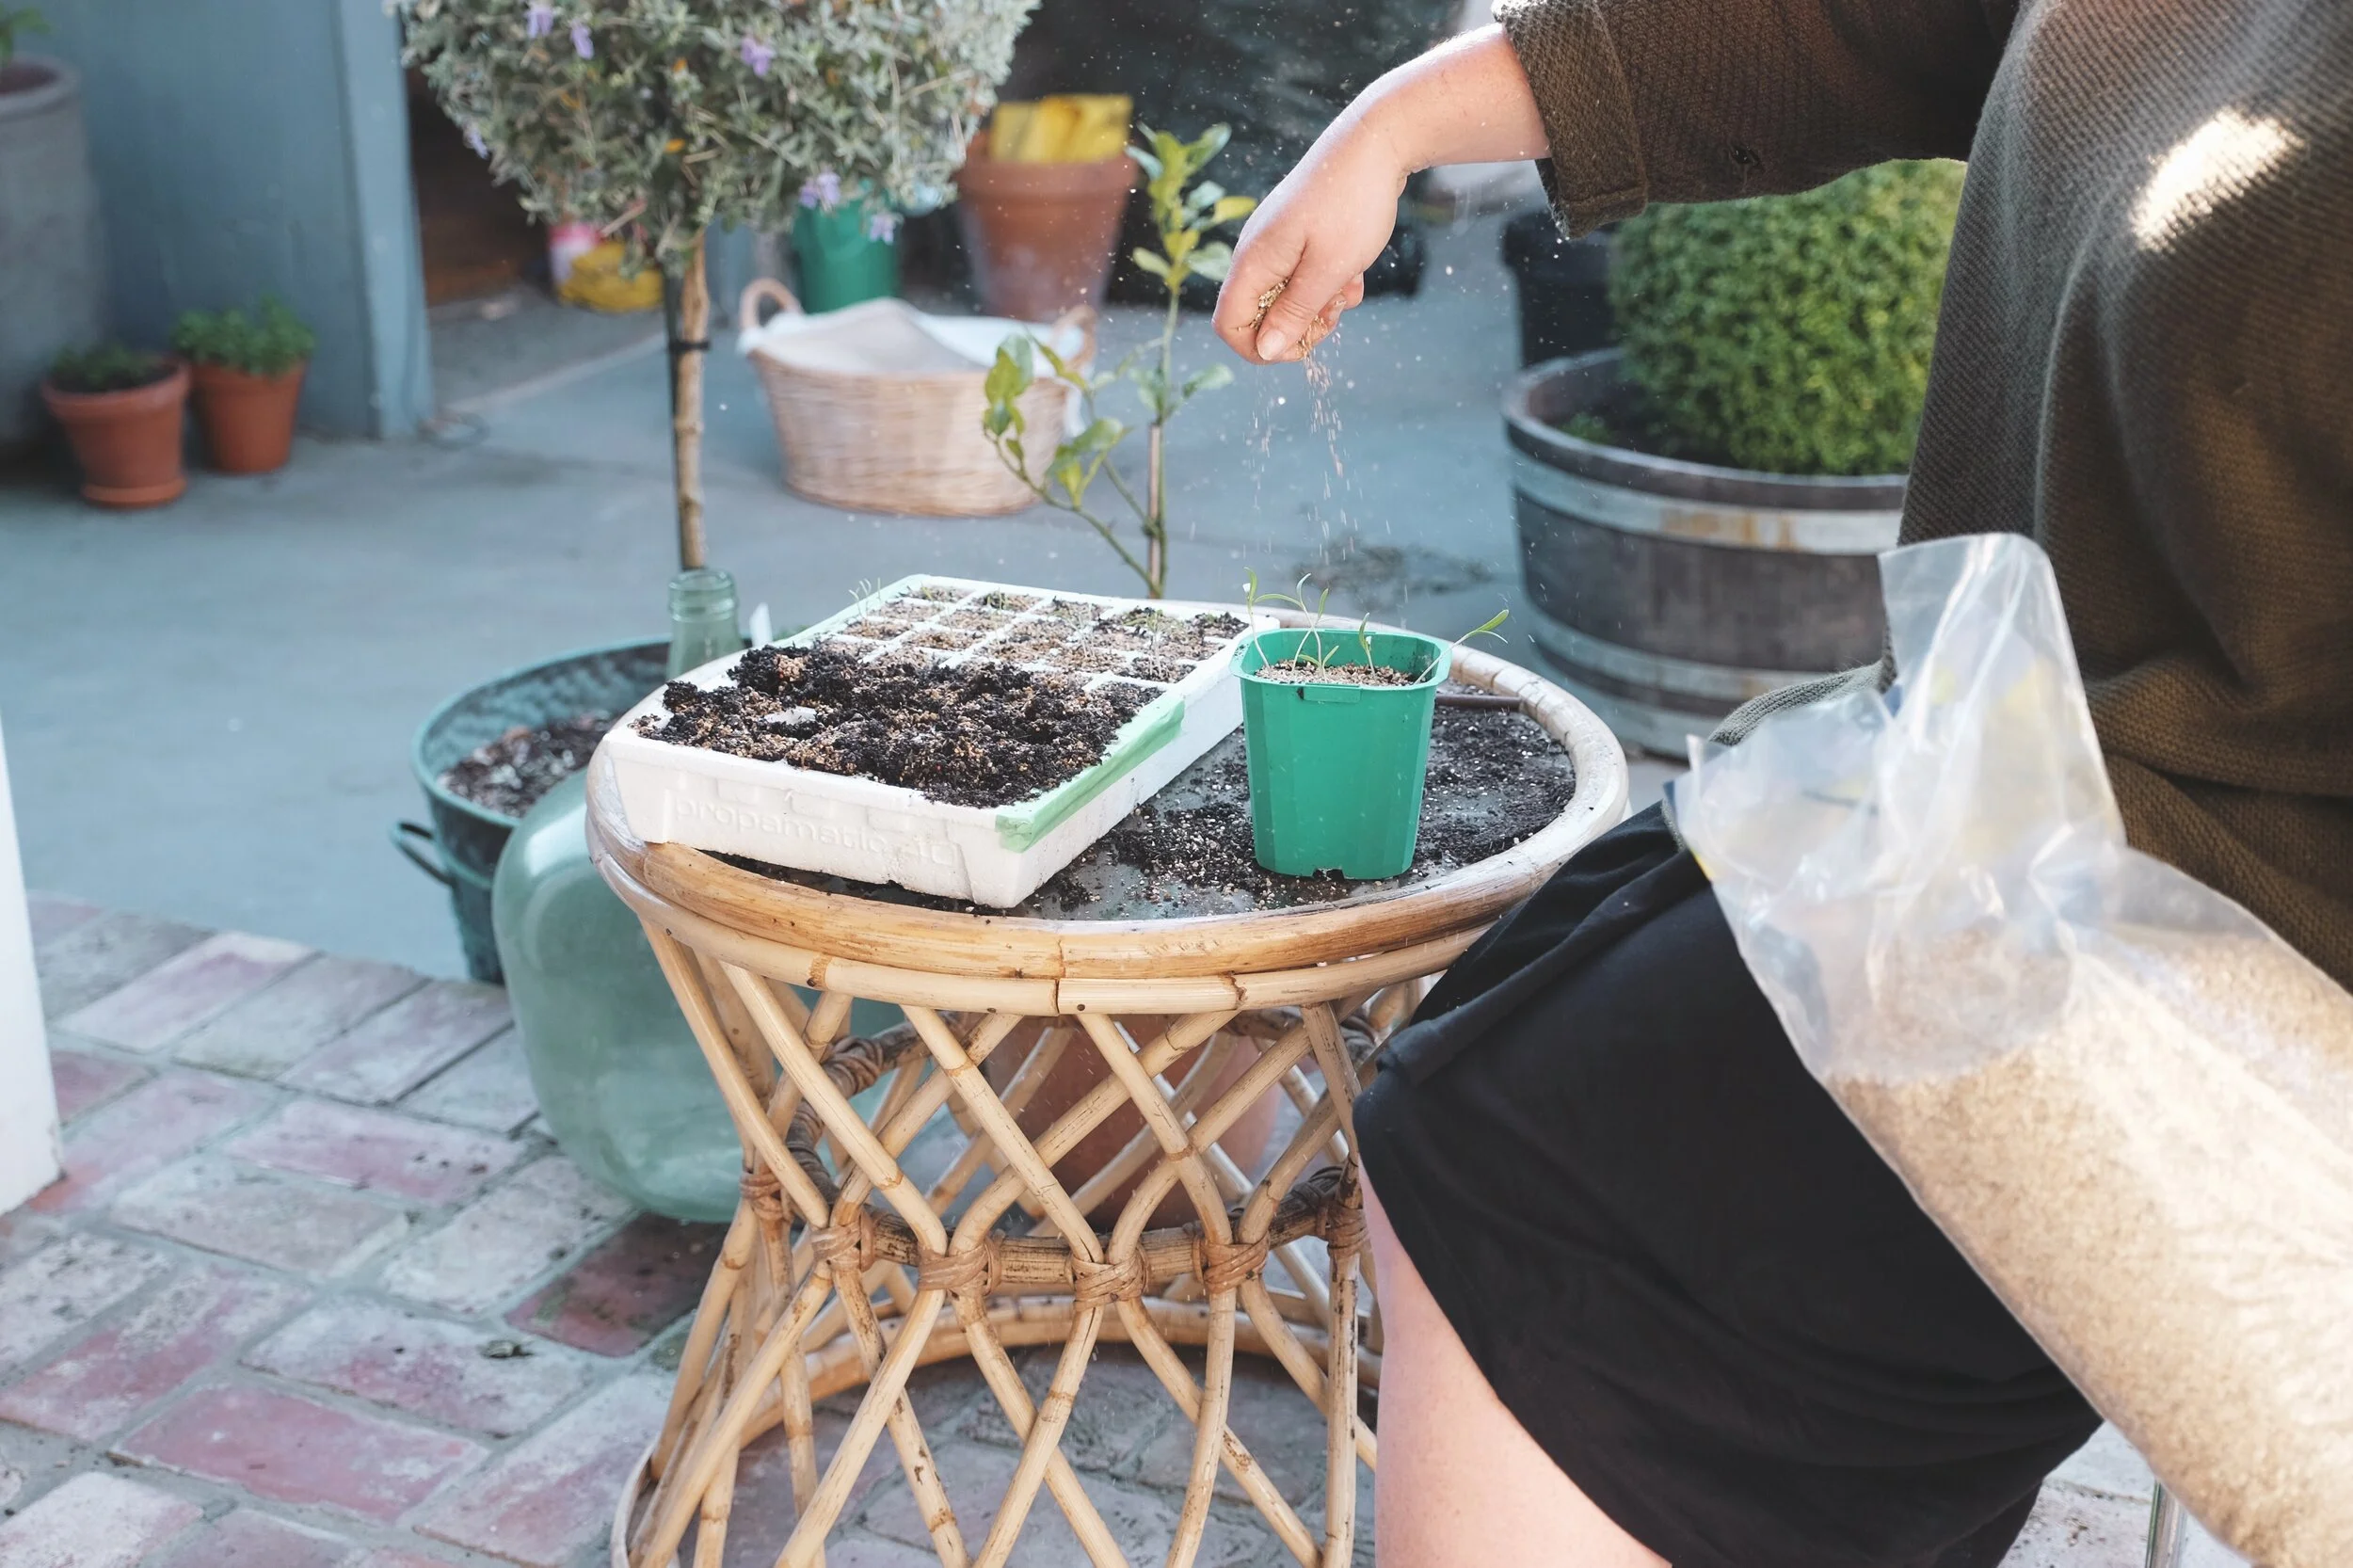
I've taken to sprinkling Vermiculite on top of seed trays and punnets to help retain moisture when its really hot. Prob not vital but it feels helpful. My be
Sunning seedlings with their plastic cover off during warmth of the day.
Before you begin, consider the size of your seed.
Teeny ones that look like dust are best sprinkled lightly on the surface of your seed mix filled punnets. Spray a little water on them to help get them started then make sure the seed trays are always kept moist by sucking in water from their bases resting in tray of water OR a special propagator that I have mentioned above. It is possible to keep them too wet too! So just monitor them daily ....treat them like your babies!
Bigger ones like Sweet Peas and Lupins can be planted one at a time and pushed deeper into the seed mix in the punnet. Using a pencil to punch a little hole can be helpful to drop seed into and gently cover in.
These flower growing experts say it best....
"The size of your seed generally dictates the depth at which it is sown. Large pea-like seeds can be pushed down to half a knuckle's depth; medium seeds should be covered with a light sprinkling of compost (aka seed mix) or vermiculite; and tiny seeds should be sown on the surface"
Clare Foster
Author - "The Flower Garden" How to grow flowers from seed
."...a general rule of thumb is to plant the seed twice as deep as its longest side."
Erin Benzakein
Author/Commercial flower grower"Floret Farms - Cut Flower Garden"
Positioning and Care
After you have filled your trays/punnets/pottles/pots with seed mix and then dressed them with their seeds based on the little guide above, you then need to offer them a very friendly environment to grow into big strong green things.
In terms of space, the spot I can offer is on the sheltered and sunny shelving I have on my back porch.
In Spring time I start seeds in my propagator (that's it pictured below) that has its clear plastic lid to create humidity and get things moving. Once it gets warmer I may skip the lid or use other containers to start seeds, sometimes draping an old plastic bag (if you have any left!) over the top in the evenings to keep them cosy.
SOME friends make use of the top of their fridges that warms the seedlings with gentle heat, and a sunny table inside is also a great option.
Take from this...at the beginning/germination, they like gentle warmth and moisture to get their first shoots to pop through the soil.
Your seedling punnets need to have their bases seated in a tray that you can easily top up with water. This way they will draw moisture from the base, without being totally disrupted and risk of being washed away by watering from the top.
My propagator has a water delivery system that I top up, but often, if not using that, my seedlings sit in old oven or serving trays that I've picked up second hand (see further below). Daily checking in is needed so your punnets don't dry out but avoid having them sitting in water the whole time as this will deliver you nasty probs like mildew and seedling death/non germination.
Once my seedlings get a couple of sets of leaves, I then leave any covers off and they naturally "harden off" with the fluctuations in heat during the day in their covered outdoor position.
Keeping them covered for two long will make them spindly as they grow in their luxurious warm home.
"Pricking out" seedlings from my propagator to pop into larger deeper pots to keep growing before planting out into garden when they have more sets of seeds. I potentially could have left these seedlings in here to mature, but I wanted to make room for more seeds to have their turn to germinate.
Potting on and graduating to the garden
To be honest, I just judge this on gut feeling!
Graduating my seedlings into larger group pots is something that I do to make room in my propagator to grow more - this is called "pricking out" and I generally fill their new home with seed mix as opposed to other options.
In terms of moving the new plants to the garden, initially I took inspiration from the size of the seedlings available in trays that I would buy at the garden centre. Once mine appeared a similar size and seemed healthy off they would go!
Some other tips:
Once in the "wild" of your garden, you little new plants will have a target on their back for birds, I swear! So I always build a wee stick fortress around them to stop them being scratched out while so little.
Be sure to research the ideal growing conditions for your plant that you have bought to life. Don't waste your effort of all this early care to then plant in a shady position in the garden when it requires full sun to be the best plant it can be!
Don't worry if you have some failures! It is guaranteed in gardening !!
PINCHING: some plants really benefit from having their central stalk pinched off once 5 sets of leaves have grown. These are plants that naturally flower from multiple stems, not just one central stalk.
Once they are around 20-30 cms tall OR have 5 sets of formed leaves, snip out the central stalk closely top set. This will encourage the plant to form new shoots and really get your flower production looking good!
Some of these plants include dahlias, cosmos, zinnias and snapdragons.
Seedlings in open topped multi trays that I rest in old metal trays that I can fill with water, allowing each cell to absorb water from the bottom, leaving the seedlings undisturbed.
Just have a go!
In my state of 'zero growing' knowledge I turned to google and YouTube a lot. And while there was conflicting info at times, I generally just picked the bits I liked from the people I related to and went with it!It's NOT an exact science and you will find what works for you in the space and time you have - but one thing I can vouch for is the immense pride you flush with when your seed has its first flower!
Ju xo
Need ideas on what to grow from seed?
CLICK HERE FOR 6 OF MY FAVOURITE FLOWERING PLANTS TO GROW FROM SEED
All photo's were taken by me in my own garden in Christchurch, New Zealand.
Copyright of Studio Home Enterprises Ltd 2019.


